Early this year (or possibly, it’s hard to tell the flow of time, but it was “pre-COVID”), I saw a new 360 degree camera called the Insta360 ONE R. I was really interested because I’ve been thinking that a 360 degree camera might be better for my kayak videos that the split screen that I currently use (at least, what I use in the rare occasions when both cameras work). I could either publish as a 360 video or crop it to a flat but looking at what might be interesting right now (like the kayaker sneaking up behind me or the C-2 I’m about to take a rest behind).
And there are three reasons why I started thinking about this now with this camera when I hadn’t with previous 360 degree cameras:
- I’ve heard horror stories about how long it takes to stitch the video together with the GoPro Fusion and GoPro Max – like possibly more than 2-3 days for one of my 2 hour race videos. The ONE R supposedly does the stitching in the camera with “no waiting”
- The ONE R is modular, so if you decide 360 is a gimmick and you don’t want to do it any more, you can pull out the 360 module and plug in the 4k module and use it just like a Hero 7.
- There were no extended batteries for any 360 camera, just a lot of suggestions to buy multiple batteries and swapping them out, which isn’t an option in a kayak race.
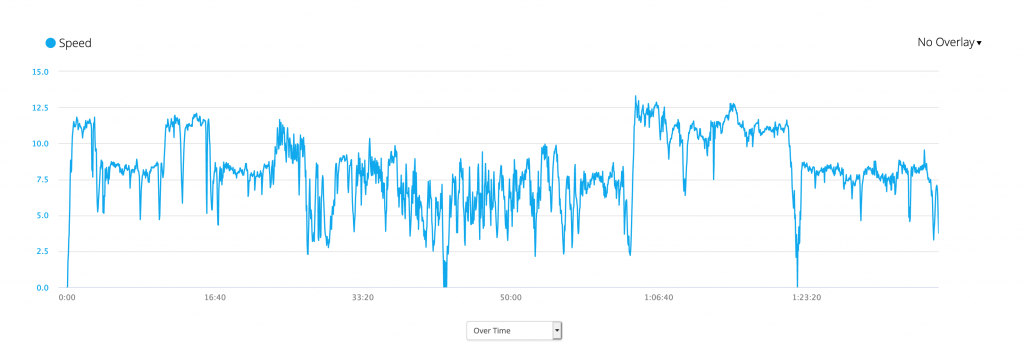
For various reasons, GoPro has always seemed to target about a 70-80 minute battery life. And GoPro’s support page freely admits that they don’t care that the GoPro Hero 7 and Hero 8 will overheat and shut down long before you hit the 70 minutes if you’re trying to use the full advertised resolution and frame rate on a summer day. I get it, I guess, their target market are guys with RedBull sponsorships shooting 5-10 minute ski or surf or mountain bike runs, not me.
The ONE R listed a similar battery life (of course, no indication of whether they have a similar overheating problem), but they also listed a “boosted battery base” as an option that was coming soon. The “boosted battery base” would double the number of milliAmp-hours, theoretically giving you twice the battery life. But it wasn’t out, so I just bided my time.
Well, the Boosted Battery Base is now out. And to my massive disappointment, they have the following warning on the order page:
ONE R is not waterproof or designed for extreme action shooting when assembled with the Boosted Battery Base.
https://store.insta360.com/product/one_r_battery
I kind of don’t want to buy $500 for a camera if it’s going to be ruined if I tip over. That doesn’t often happen in a flat water race, but I have been pretty soaked by rain. And once would be enough.