Kayak Construction: Need to take some time to think

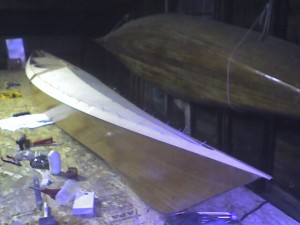
Yesterday I glued the seams on the deck of the kayak. Today I’m supposed to be taking off the wires and filling in any seams that didn’t get filled. I took a look at them, and there are some major problems and some minor ones.

Major problems:

  • The tail section didn’t go together correctly. It was so bad that I’ve had to cut the glued seams with a carpet knife. I’ve tried to slide a bit a scrap wood under it and using a combination of nails, tape and clamps tried to get it to sit right and I’ll have to re-glue it later.
  • Two places on the deck, around where the bow and stern temporary forms are, the deck has actually slumped down too low and is too wide for the hull. I’m hoping that after I glue the under side and put it back on to dry, I can somehow manipulate those sections to sit right, but I fear that I’m going to end up carving the wood along the shear line to make it fit.

Minor problems:

  • lots of glue spills on the outside of the boat that need to be scraped and sanded off
  • some HUGE glue spills on the inside of the boat, some that went down into the hull will require lots of work to get off
  • Most of the epoxy has set up correctly, but some is still rubbery. Hopefully that’s just a matter of time, and not that I somehow didn’t mix the hardener in correctly.

It’s times like this that I have to keep reminding myself that nobody else will see all the flaws.

Kayak Construction: Finishing the deck wiring

Today I finished wiring the rear deck panels, attached the deck recess plate, and positioned and taped the deck down on the hull, and tightened all the wires. I was going to start gluing the deck seams, but a thunderstorm started as soon as I was about to start mixing the epoxy so I called it a day.
Continue reading “Kayak Construction: Finishing the deck wiring”

Kayak Construction: Starting the top deck

Oh, two posts in one day! After the epoxy had dried a bit I went to scrape off the excess and I realized it was actually dry enough that I could work with it if I were careful. So I started wiring the deck. And it went pretty well. It was great to see that the lessons I learned from the hull are making the deck work much better. I got the front panels (panel #4) wired together, the shear panels (panel #3) drilled and wired to the front panels, and started on the rear panels as well. Everything is wired very loosely so that I can make adjustments afterwards.

It looks great, and I can really start to see the beautiful lines of the kayak for the first time. It looks exactly as I hoped, a hard chined British-style.

And once again, I am reminded that no matter how tempting it is, you should not put the portable drill down on the battery pack as shown in every catalog picture you’ve ever seen. I’ve now knocked over the drill again and broken a third 1/16th inch drill bit. I’m trying very hard to put the drill down on its side, in the hopes that my last 1/16th inch drill bit will last until the end of this project.

Kayak Construction: Flipping the hull

Today I start on the deck. First task is to glue the back of the cockpit together. That took about 30 seconds. But since once that’s done, the next step is to start putting assembling the deck on the boat. So I took the time to remove the two seven inch high pieces that were screwed onto the temporary frames when I first turned the hull upside down to work on the outside.
Continue reading “Kayak Construction: Flipping the hull”