
So the bathroom fan in the trailer has been a bit of a pain point for two reasons:
- First, and foremost, Vicki has trouble reaching the knob that opens the cover, and the switch that turns on the fan.
- And as a secondary consideration, the fan is tiny and doesn’t move a lot of air. Also only vents outward at one speed.
So I bought a fan that actually fills the whole housing, has a speed and direction control, and which has a remote control. Then I waited for several weeks to install it because I was looking for a weather forecast that showed two days of no rain and non-scorching temperatures. It seemed like every day was either raining or temps above 90F. So we got the weather window on Monday and Tuesday. Sure, the temps were still in the high 80s, but that’s better than 90, anyway.
I’d been told by people who’d done it that it should only take one day, but I know my limitations, and I also know how many times I’ve found in the middle of a project that I had to run out for more tools or supplies. Turns out that planning for two days was a smart decision.
I’ve watched a number of YouTube videos on how to do this, and they all said that you basically just need to “roll up the rim” (sorry, non-Canadians, you won’t understand) or peel off the existing sealant after you take the old fan out. Well, I was unable to do that – it was stuck too hard. Instead I used a sharp scraper and just sliced off the layers of sealant as best as I can. I did end up gouging into the trailer roof skin a few times, but I made sure to put extra sealant on those areas.
Cutting off as much of the sealant as I could took all of the first day. At the end of it, I was dehydrated and extremely sunburned. No idea why I forgot to put on sunscreen. It’s not like I’ve been getting regular sunburns since I was a baby.
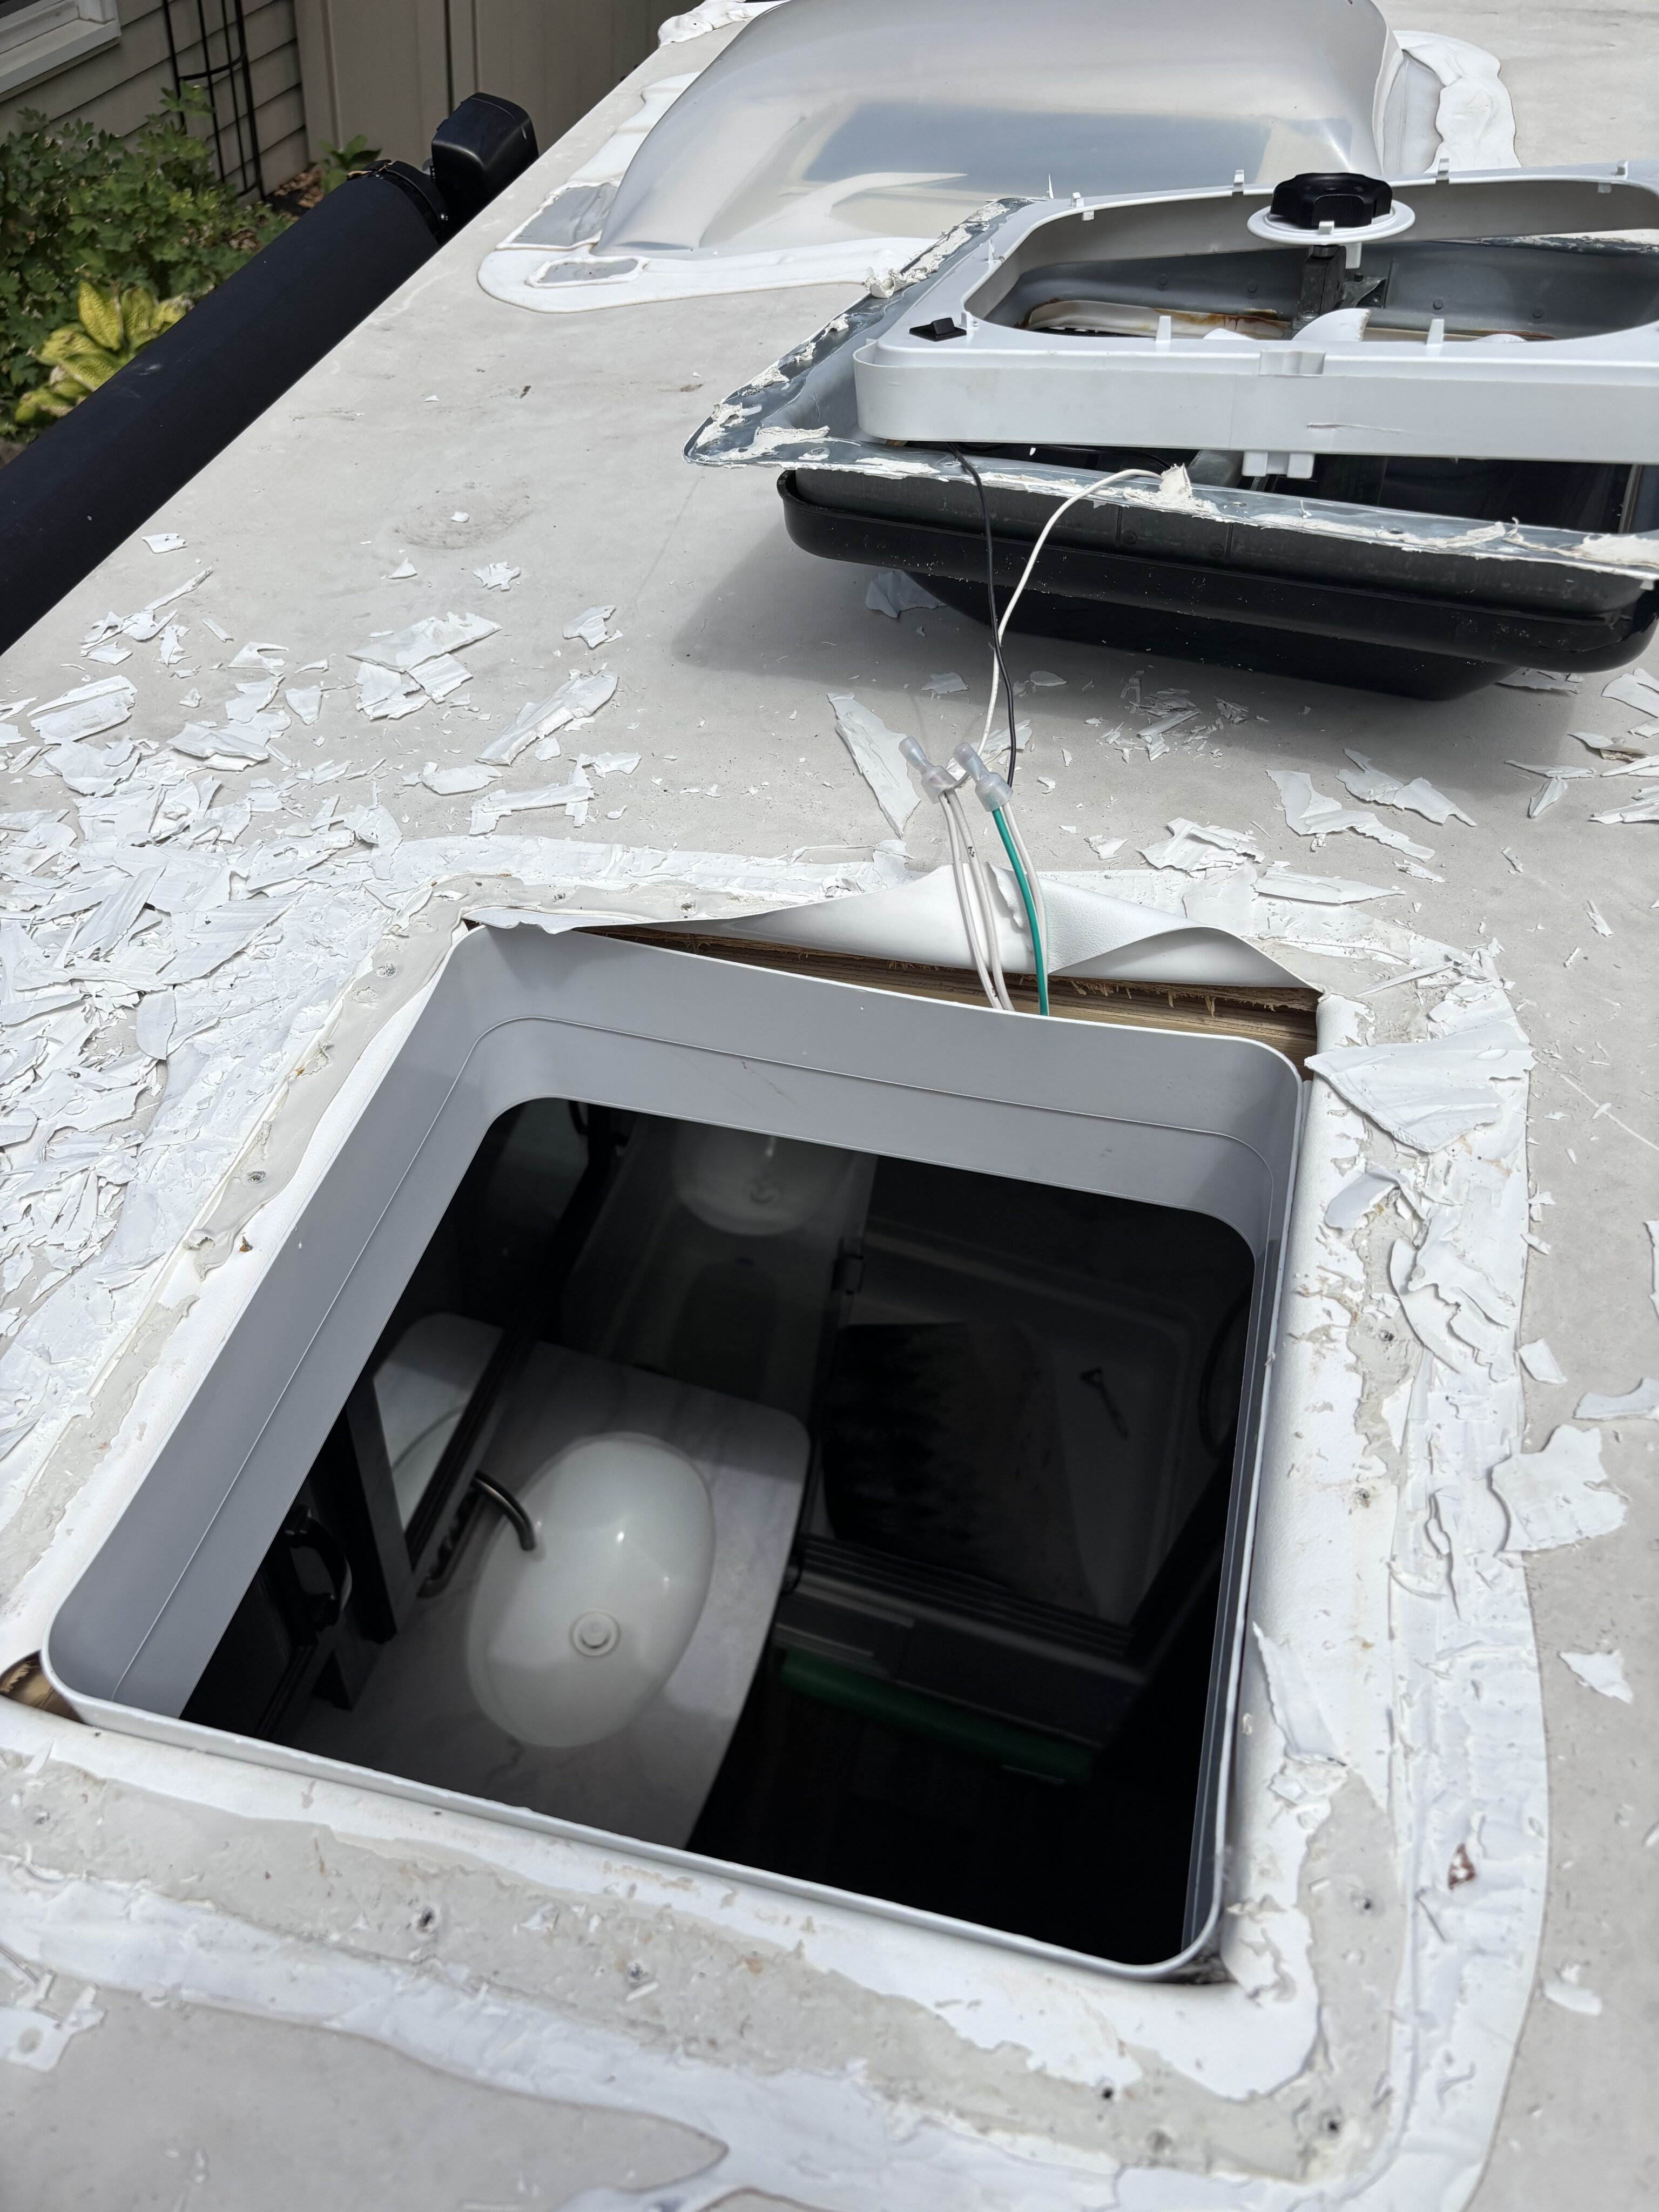
As you can maybe see in the photo above, the wires come out from under the folded over roof skin. I cut those off, and I went to Home Depot and bought some WAGO connectors to wire the new fan in. Now it had power, I tested the fan with the remote and with the switches on the inside. Worked great.
I drilled new holes where the holes were in the new fan housing, because they weren’t all in exactly the same place as the old one. I put down strips of butyl tape over both the old holes and the new holes. The fan fit into the existing hole just fine, except I was disappointed to find I needed to take out the existing interior shroud and use the one that came with the new fan. I was hoping to avoid it, because I wasn’t 100% confident in how I was going to trim the new one to the contour of the roof. Turned out it was super easy, barely an inconvenience.
After I screwed the fan down onto the butyl tape strips, I put sealant all over the flange, and the edges of the flange. I used one tube of the stuff. I’ve heard other people talk about using 3 tubes of it, but I can’t see why – it seems like I used twice as much as you’d think, and it was piled up pretty high.
After that, I tidied up the roof, and went inside and marked and trimmed and installed the interior shroud. Tested the fan again, and it worked great. Then I had to put on gloves and fish out the bits of sealant that fell in the toilet when I was scraping.
Afterwards, Vicki gave it the full test. She pronounced it satisfactory. I’m very proud.